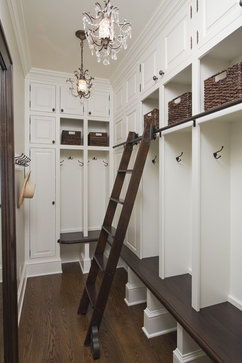
Some more photos for ideas for where coats, boots, shoes etc. can be stored.
This idea has evolved into a room for coats, shoes etc.

and this shot (below) is more if a dedicated room for this storage:

and another one:


Some more photos for ideas for where coats, boots, shoes etc. can be stored.
This idea has evolved into a room for coats, shoes etc.
and this shot (below) is more if a dedicated room for this storage:
and another one:
Create a fire side seating (snoozing) with a view nook ?

With the latest layout / design ideas in from architect Rob, this could either go below the wall from the dining area (to the right of the fire as you look at it), or to the left of the fire and so surrounded by glass and closer to the view.
This could fit in well with the idea of a glass corner and the other fire place posts.
Wouldn’t it be great to set-up Perranporth Low Carbon Limited ?
Attending some eco-build talks at the Eden Project, one of the speakers is involved with Hook Norton Low Carbon Limited.
It is an Industrial Provident Society, set up by Low Carbon Hook Norton members to help the community reduce its energy consumption, carbon emissions and save money, with a range of community-based schemes and individual household projects based on interest-free loans.
From the talk, it seems they coordinated getting funding and then the residents and suppliers to slowly help everybody (residents, the school, local firms ….) benefit (lower fuel bills, jobs to implement the projects …..) and move to a lower carbon / more sustainable village.
In relation to this, it’d probably make sense to chat with http://sustaincornwall.co.uk/ and the linked Cornwall Sustainable Building Trust
Some courtyard inspiration from Olivia.

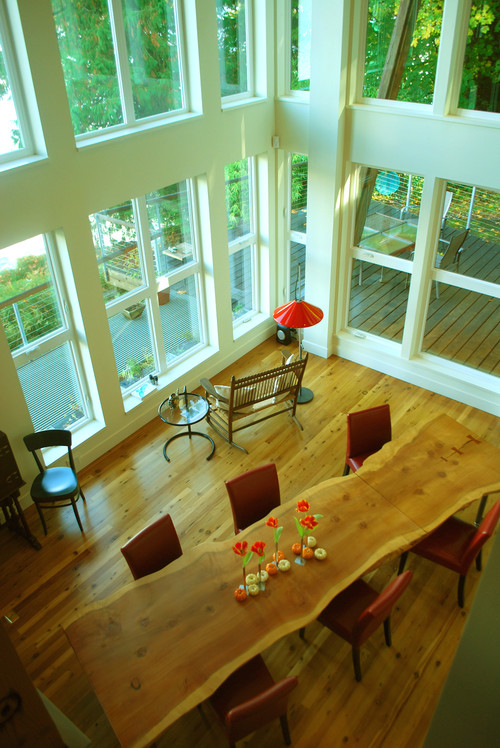
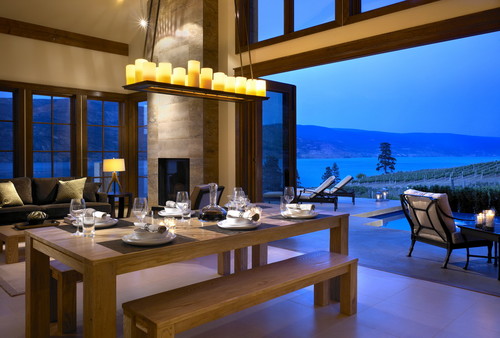
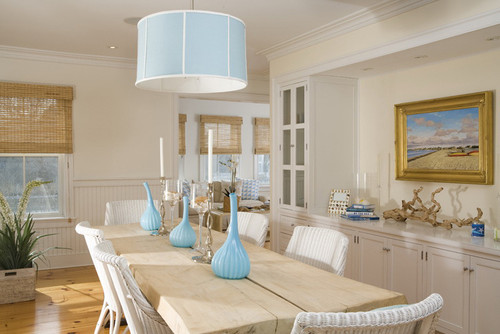
It’s a big dinning area, so it’ll need a big table.
Hopefully made from timbers reclaimed out of the original Silver Spray bungalow.
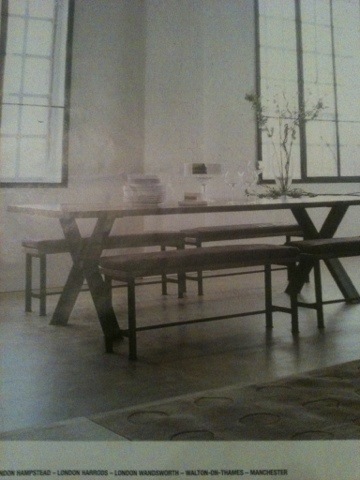
And then maybe benches or a collection of second hand chairs, that don’t match each other or the table.

Get “industrial” big metal legs / frame for the table by finding something that can be recycled to this use:
[alpine-phototile-for-pinterest src=”board” uid=”roryjenkins” board=”silver-spray-dining-area” imgl=”pinterest” dlstyle=”medium” style=”cascade” col=”4″ size=”192″ num=”12″ shadow=”1″ border=”1″ highlight=”1″ curve=”1″ max=”100″]
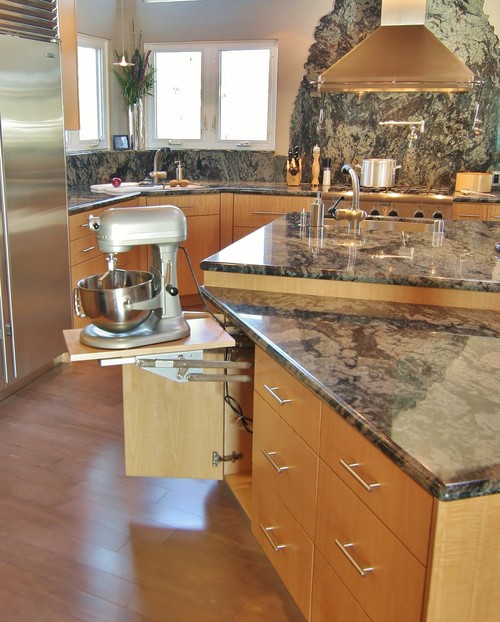
Some great kitchen ideas in this post at http://www.houzz.com/ideabooks/846615?utm_source=Houzz&utm_campaign=updates&utm_medium=email&utm_content=gallery8&w=411212
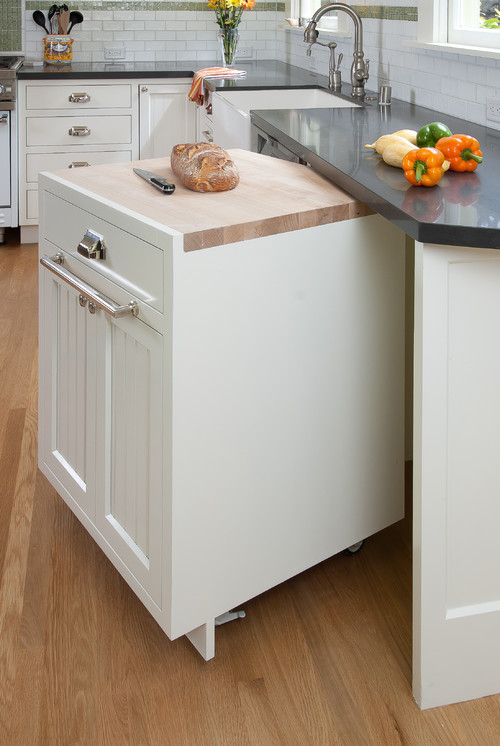
Not sure if this idea means a very inefficient cupboard, but a cool idea to take those big things off the kitchen surfaces.
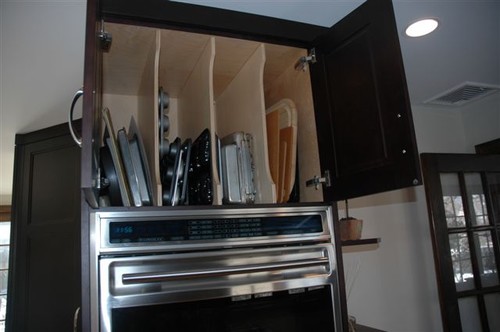
Design in somewhere for trays (baking and food trays, also cutting boards)
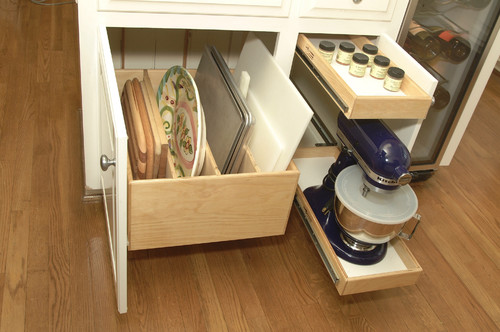
Check out this roll-around cabinet that tucks underneath your countertop !
– It can be moved to where it’s needed, then hidden away when not in use.
I’m reading Kevin McCloud’s 43 Principles of Home. From watching Grand Designs I didn’t get this much of an impression of him being aware of eco / environmental / sustainable issues.
Anyway, not related to that, but a great design methedology bit from NASA:
From http://www.nasa.gov/audience/foreducators/plantgrowth/reference/Eng_Design_5-12.html

STEP 1: Identify the Problem — Students should state the challenge problem in their own words. Example: How can I design a __________ that will __________?
STEP 2: Identify Criteria and Constraints — Students should specify the design requirements (criteria). Example: Our growth chamber must have a growing surface of 10 square feet and have a delivery volume of 3 cubic feet or less. Students should list the limits on the design due to available resources and the environment (constraints). Example: Our growth chamber must be accessible to astronauts without the need for leaving the spacecraft.
STEP 3: Brainstorm Possible Solutions — Each student in the group should sketch his or her own ideas as the group discusses ways to solve the problem. Labels and arrows should be included to identify parts and how they might move. These drawings should be quick and brief.
STEP 4: Generate Ideas — In this step, each student should develop two or three ideas more thoroughly. Students should create new drawings that are orthographic projections (multiple views showing the top, front and one side) and isometric drawings (three-dimensional depiction). These are to be drawn neatly, using rulers to draw straight lines and to make parts proportional. Parts and measurements should be labeled clearly.
STEP 5: Explore Possibilities — The developed ideas should be shared and discussed among the team members. Students should record pros and cons of each design idea directly on the paper next to the drawings.
STEP 6: Select an Approach — Students should work in teams and identify the design that appears to solve the problem the best. Students should write a statement that describes why they chose the solution. This should include some reference to the criteria and constraints identified above.
STEP 7: Build a Model or Prototype — Students will construct a full-size or scale model based on their drawings. The teacher will help identify and acquire appropriate modeling materials and tools. See the design brief for a sample list.
STEP 8: Refine the Design — Students will examine and evaluate their prototypes or designs based on the criteria and constraints. Groups may enlist students from other groups to review the solution and help identify changes that need to be made. Based on criteria and constraints, teams must identify any problems and proposed solutions.
Spotted this great idea on http://www.thecoolhunter.net/house.
Fab idea, nice wooden, bulky, chunky bits of wood to hang coats, bags, hats etc. off in the cloakroom (or wherever ends up being the room for all that stuff as you come in and out.
I like that they aren’t all in the usual straight line.

I found this company, http://www.eurban.co.uk, who specialise in pre-made timber panels (SIPs) that by their construction are already weather proof (apparently).
On this project (that was on Grand Designs, it’s the Mimi and Andre De Costa project), http://www.eurban.co.uk/Projects/PRIVATE+HOUSES/Headcorn+Minimalist+House, the PDF factsheet, says that Eurban provided the structural design of hybrid timber and steel superstructure. The used materials were crosslam, steel and exposed timber finish throughout. Installation took 4 weeks. The stored carbon due to the wood panels was 139 tonnes of CO2.
I also like the possible idea of leaving the inner walls wooden !

There are firms about such as the one in Bodmin and http://www.modcell.com/ that make units with straw or other insulation, that could go into a steel frame.
One of the architects I’ve been chatting with has suggested / pointed out, that given the site a timber frame could flex too much in the exposed site, so damaging the building envelope.
He comes from a background of creating sustainable / environmental buildings and has no building /builders allegiance, so I’m taking the comment as not biased.
Stell has high embodied energy, so the environmental “cost” of building with stell goes up, but it is potentially a lot more recyclable in the long run than say brick or concrete.
I have therefore been thinking and looking out for an eco/sustainable way to build a steel framed house with timber and natural insulation between within and between the steel frame.
And up pops a Grand Designs programme about a house that is almost exactly this !
The house, built by www.adaptahaus.co.uk has a steel frame, then wooden and naturally insulated panels. They also have a funky looking system where you can move internal walls about at a future date !
On their http://www.adaptahaus.co.uk/buy.php page they have:
Budget on £180 per square foot for the completed house (not including renewable energy systems)
Also, nice to see that “our system achieves a level 4-5 CSH qualifi cation, which is above the current standards for social housing.”
Pictures from Adaptahouse below.
Notes on Steel Houses from 4Homes site:
One thing that can be important though if it is near the sea is to ensure that the steel is galvanised, which will stop it from eroding too quickly.
– I was assuming it’d also make sense to have no or minimal exposed steel.How Eco-Friendly Is Steel?
Possible erosion is one of only very few downsides to building with steel. However, another is its lack of green qualities. Compared to timber, steel is not as environmentally friendly. A spokesperson for eco homes and sustainable development portal www.whatgreenhome.com says, ‘Whichever way you look at it, steel can’t be considered a “green” material. Making it requires burning fossil fuel bi-products at extremely high temperatures, which uses large amounts of energy and releases CO2 into the atmosphere.’
Kane notes that compared to building with timber, steel constructions don’t require cutting down trees. It is a fair point – if indiscriminate or illegal felling is practised – but from an environmental perspective, when trees are forested (managed) and only used from FSC sources they are beyond compare because no CO2, which is the major greenhouse gas that causes climate change is emitted when trees are felled.
What Does Steel Cost?
On the issue of price Kane says steel costs less than either masonry or brickwork. ‘There isn’t really an approximate cost, though. It really depends on the size of the building as it is priced per tonne and the amount used in any one building may not be the same as any other. It is a very cost-effective material though, which is another reason it is used in the construction of so many modern skyscrapers. Another benefit is that it can help to keep labour costs low because the work can be done so quickly.’


The initial ideas back from the first architect show that access from the higher rear, to the rear sun courtyard is going to be a challenge.
I’d said to not move the rear garage, but perhaps by doing so, there are better ways to enter the property from the rear parking?


")