Mirror ideas for sinks that look out at the sea

Conventionally there is a mirror in front of the bathroom sink.

BUT, I’m going for a waist(ish) high wall behind the bed, with the sink(so) behind this.
So where to put any mirrors, that at some point you’ll need for shaving etc.

The Scarlet Hotel have wall to between waist and chest high. That makes sense in terms of a barrier to splashing etc. onto the bed.

– I also want the wall behind the bed to be at least a foot thick so that it can contain an alcove / cubby hole into which your normally bed side books etc. can go. That’ll mean no need for bed side tables and so more space for a wider bed +/or more space to the side of the bed.

Post Original Post Comments:

  • It’d be good to have other full sized mirrors in the bathroom, to reflect the view and light. But is there a good spot to put one.
  • There is the idea of putting a full size mirror on the back of the door from the dressing room (behind the bathroom) to the loo (off the dressing room). So that when the loo door is closed the entire back of that door is a floor to ceiling mirror.

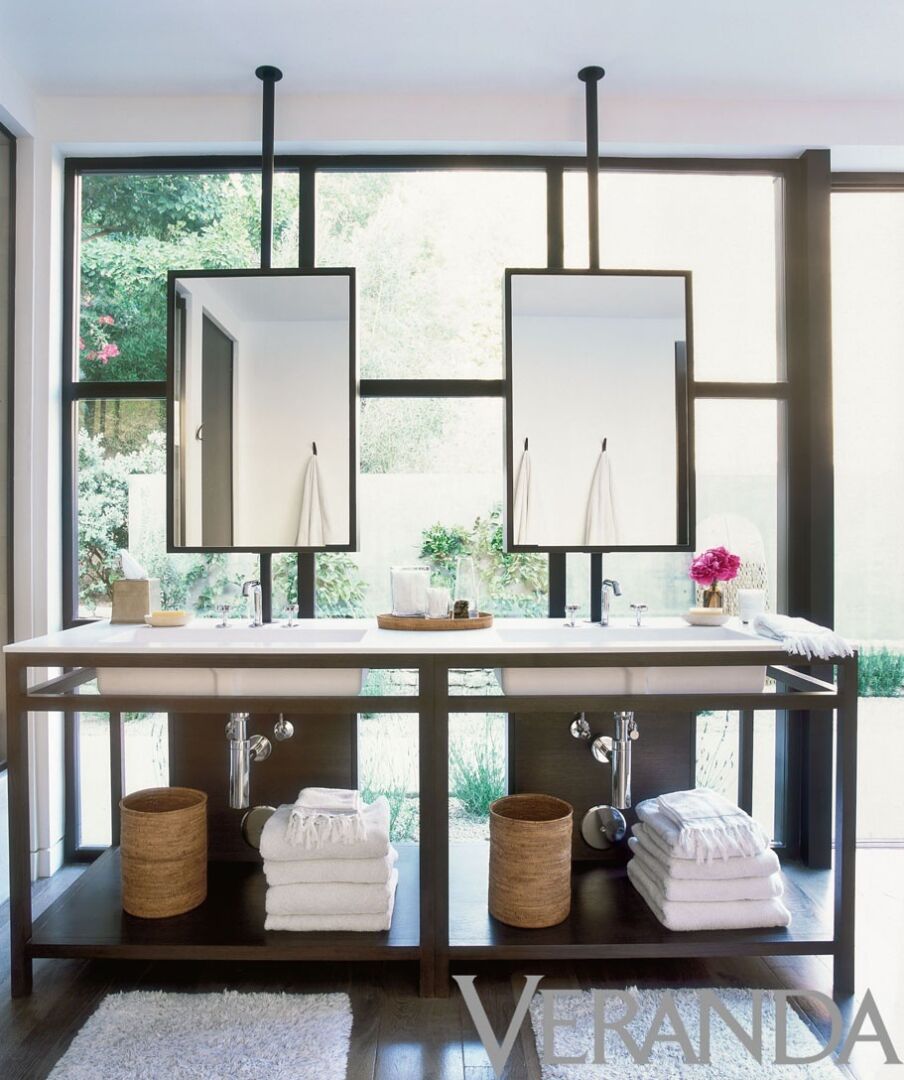
Here’s a photo of the Scarlet Hotel mirror and then some others I’ve found:

There’s something to be said for the most simple and low-tech approach. A freestanding makeup mirror keeps this window entirely unobstructed for sunshine and the view. What a cheerful spot to start the morning.

Or some designer thing?
Not sure if it’ll work in the room, but the idea of cables / chains to hang a picture mirror down appeals !
This could make it easier to put a heated panel on the back of the mirror to keep it from steaming up ?
Which could be even easier if the mirrors were on pipes to the ceiling.
– which could allow the mirrors to rotate, but that could cause it’s own problems.
mirror - on poles or pipes
Evolving the above mirrors, and adding in the idea of these being mirrors on both sides:
With a half height wall between the bed and bathroom area for the 2 sea side bedrooms, the idea is for mirror(s) that are in this open space:

front bedrooms from outside

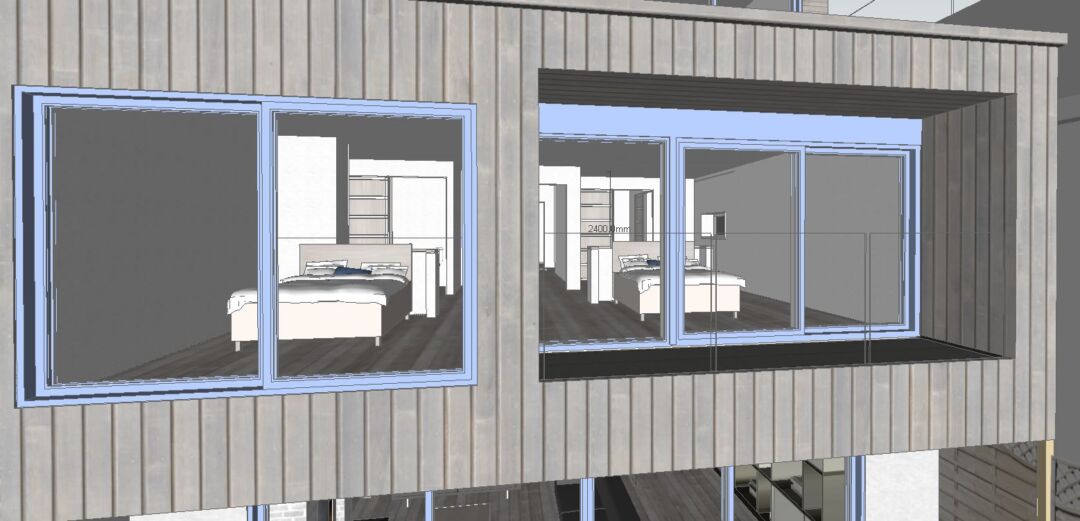
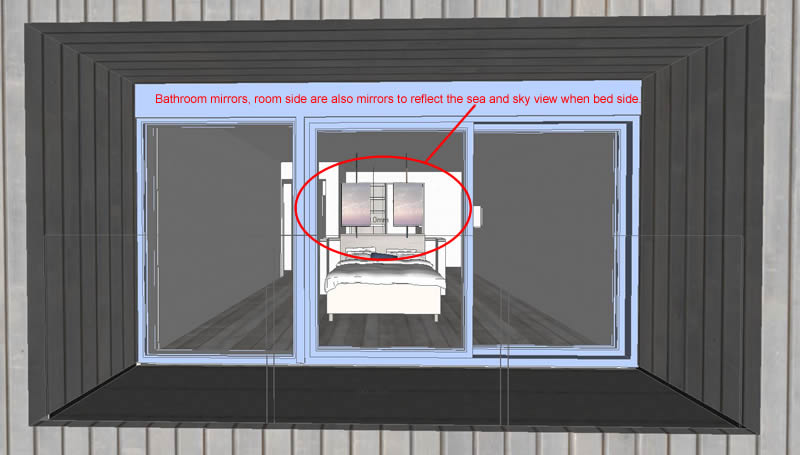
The above photo from the SketchUp model shows how you can see from the bed, back into the bathroom areas.

The current idea is mirrors that are on supports from above and below:

double sided mirrors - from inside - mockup

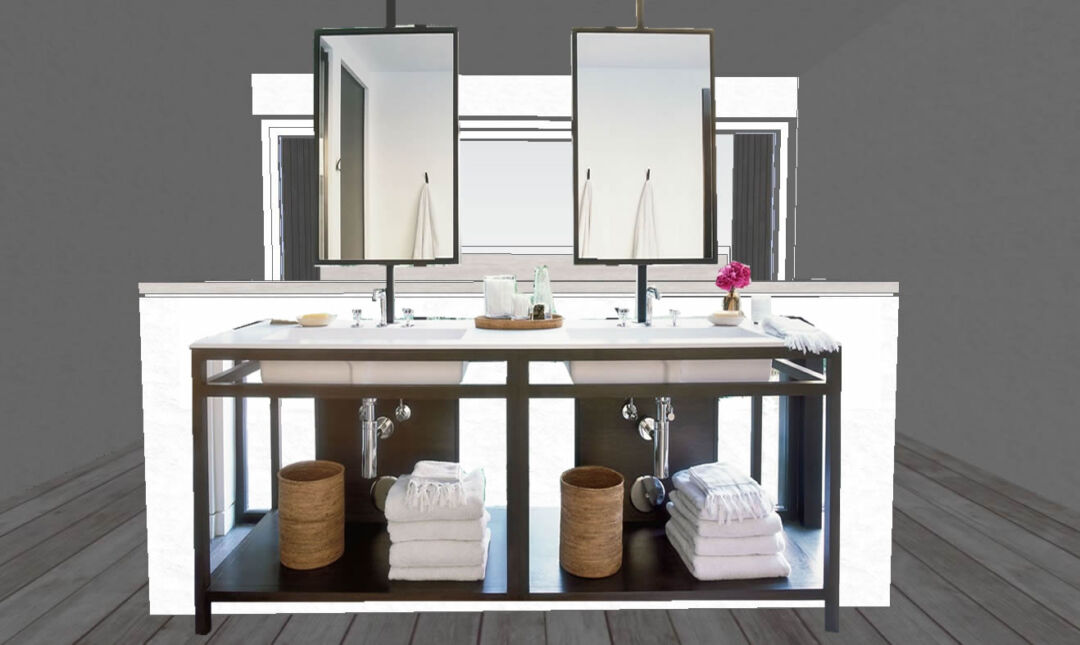
The sinks and storage will probably be different from the above mockup.

From in the bedroom, these can be mirrors on the other side, so that in the bedroom area, they are mirrors of the view out to the sky and sea:

double sided mirrors - from outside

Artwork idea – cut outs from rusting metal sheets

I saw these in an art gallery in Kalk Bay, Cape Town.

I like the idea of taking an old sheet of rusting metal. Chalk (or something) drawing on some shapes, cutting them out and then ending up with the cut outs to perhaps put in the house and the sheet with it’s holes put in the garden or some such.

Maybe dolphins, fish and flying fish ?

Property Adaptations for Dogs

Dog bowls integrated into the kitchen island.

chezerbey modern kitchen

Bone handles in the drawers above the dog bowls, where dog stuff goes.

Seaside whimsy in Centerville, MA eclectic kitchen

Make the stairs close together, so smaller steps, which makes it easier for dogs.

Brown Davis Interiors, Inc. contemporary staircase

The NASA Design Process

http://www.nasa.gov/audience/foreducators/plantgrowth/reference/Eng_Design_5-12.html

STEP 1: Identify the Problem — Students should state the challenge problem in their own words. Example: How can I design a __________ that will __________?

STEP 2: Identify Criteria and Constraints — Students should specify the design requirements (criteria). Example: Our growth chamber must have a growing surface of 10 square feet and have a delivery volume of 3 cubic feet or less. Students should list the limits on the design due to available resources and the environment (constraints). Example: Our growth chamber must be accessible to astronauts without the need for leaving the spacecraft.

STEP 3: Brainstorm Possible Solutions — Each student in the group should sketch his or her own ideas as the group discusses ways to solve the problem. Labels and arrows should be included to identify parts and how they might move. These drawings should be quick and brief.

STEP 4: Generate Ideas — In this step, each student should develop two or three ideas more thoroughly. Students should create new drawings that are orthographic projections (multiple views showing the top, front and one side) and isometric drawings (three-dimensional depiction). These are to be drawn neatly, using rulers to draw straight lines and to make parts proportional. Parts and measurements should be labeled clearly.

STEP 5: Explore Possibilities — The developed ideas should be shared and discussed among the team members. Students should record pros and cons of each design idea directly on the paper next to the drawings.

STEP 6: Select an Approach — Students should work in teams and identify the design that appears to solve the problem the best. Students should write a statement that describes why they chose the solution. This should include some reference to the criteria and constraints identified above.

STEP 7: Build a Model or Prototype — Students will construct a full-size or scale model based on their drawings. The teacher will help identify and acquire appropriate modeling materials and tools. See the design brief for a sample list.

STEP 8: Refine the Design — Students will examine and evaluate their prototypes or designs based on the criteria and constraints. Groups may enlist students from other groups to review the solution and help identify changes that need to be made. Based on criteria and constraints, teams must identify any problems and proposed solutions.

I like the splash of blue on white

image

This idea and these colours could be used for both the kitchen and the coats etc. store area.

Colours wise, it seems to tie in with this property that I feel has a nice coastal look and feel through the materials and colours:

Having the kitchen island a stand out colour:

Interesting, how in this picture the white becomes the stand out item.
– I’m thinking the colour being the lower volume item(s) will work better at Silver Spray.

I must dig out the information I found on kitchen tops that are made from recycled materials.

  • Wood looks great, but you have to look after it, for it not to slowly not look as good.
  • I’m not convinced by marble. I’ll have to look at a few.
  • This kitchen with light grey floors and wooden tops seems to work well:

I’ll have to get some designer, friends and family input on something this modern or a more traditional look such as:

Layout wise, still stuck on whether the island should have the cooker +/or sink +/or water source.

If it does, then this kitchen extractor hood looks great.

Hot tub ?

mmmmmm

It seems my friends are more inspired by the house having a hot tub than anything else!

Yes, it would be great fun, to sit in a hot tub outside the lounge or on the balcony at the top by the study. BUT can I find a way to be a bit eco about how to heat the water ? (Lets face it, having a big body of heated water outside, can’t be that efficient). So, ideas on the best way to achieve the idea:

  • Use hot water that is heated by the solar panels and a back burner on the fire?
  • The Scarlet Hotel hot-tubs aren’t metal as I thought, but made out of  Glass Fibre Polyester. Looking at the Website of the Dutch firm that makes these log fired hot tubs, you can use a hose to fill them. So maybe you could use the house hot water tank to pre fill the tub with the 800 litres of  hot water. Then use the fire to keep the water warm.
    • These tubs are 170 x 260 cm wide (specification),
    • “The weight of the Dutchtub can reach 1400 kg / 3000 lbs, a small platform under the tub can spread the total weight on more square meters than just the four legs of the tub.” (Safety).
    • The English agents are www.BigFire.co.uk